
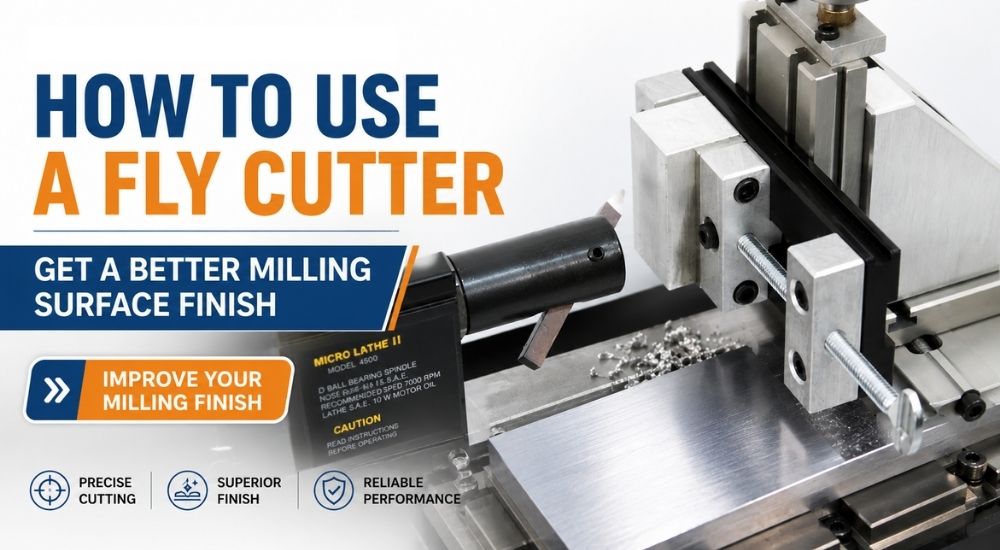
You finish a milling pass, look at the workpiece, and still see lines running across the surface. The part is flat, but the milling surface finish isn’t as smooth as you expected.
This is where a fly cutter for a milling machine can make a difference.
A fly cutter is particularly useful for machining broad, flat surfaces, but getting a good finish isn’t just about putting the cutter in the spindle and turning the machine on. Tool sharpness, workholding, machine rigidity, spindle speed, feed rate, and depth of cut all matter.
Think of it like painting a wall. A good brush helps, but if the wall is moving while you paint, the brush is worn out, and you’re rushing the job, the final result won’t look good. Milling works much the same way. The cutter matters, but the whole setup matters too.
What Is a Fly Cutter?
A fly cutter is a type of milling cutter designed primarily for machining broad, flat surfaces. It typically uses one cutting edge that sweeps across the workpiece as the tool rotates. For applications that require a dedicated fly cutter for a milling machine, this type of tool can be useful for producing broad, flat surfaces with a consistent finish.
Because it uses a single cutting edge, a fly cutter is often used when the finish and flatness of a broad surface are more important than removing a large amount of material quickly.
Common uses include:
- Machining flat surfaces
- Squaring stock
- Taking light finishing cuts
- Cleaning up a previously machined surface
- Improving the appearance of a flat workpiece
The cutter itself won’t solve every surface-finish problem, though. If the setup is loose or the machine is vibrating, those problems can show up in the finished surface.
How to Use a Fly Cutter for Better Milling Surface Finish?
A good finish starts with the setup. Before changing your spindle speed or feed rate, make sure the basics are right.
1. Set Up the Fly Cutter Correctly
Mount the fly cutter for your milling machine securely and make sure the workpiece is firmly clamped.
Keep the tool as close to the spindle as practical. Excessive tool overhang can increase the chance of vibration, which may show up as chatter or unwanted marks.
Before you start cutting, check:
- Is the workpiece securely clamped?
- Is the cutter mounted correctly?
- Is the tool overhang minimized?
- Is the cutting edge positioned properly?
- Is the machine setup rigid enough for the cut?
If something can move when it shouldn’t, fix that first.
2. Check Fly Cutter Position and Cutting Edge Alignment
Even with a sharp cutter and a rigid setup, the fly cutter’s position can affect the final surface finish.
Make sure the cutting edge is positioned correctly and that the cutter is aligned properly with the workpiece. If the tool sits too high, too low, or at an incorrect angle, it may not cut consistently across the surface.
The cutting edge geometry also matters. A properly positioned edge should make a clean, controlled cut rather than rubbing or dragging across the workpiece.
If you’re seeing uneven lines or an inconsistent finish, check:
- Is the cutting edge aligned correctly?
- Is the tool positioned at the proper height?
- Is the cutter sitting securely in the spindle?
- Is the cutting edge contacting the workpiece as intended?
Small alignment issues can become visible across a wide surface. Before changing your spindle speed or feed rate, make sure the cutter itself is positioned correctly.
3. Use a Sharp Cutting Edge
A dull cutting edge can turn a simple finishing pass into a frustrating one.
Instead of slicing cleanly through the material, a worn edge may rub or push against it. That can increase heat and cutting forces and leave you with a rougher surface.
If your finish suddenly gets worse, don’t immediately start changing your cutting parameters. Take a look at the tool first. Sometimes, the cutting edge is simply worn.
4. Get the Speed and Feed Right
Spindle speed and feed rate have a direct effect on milling surface finish, especially when working with smaller machines where cutting conditions for small CNC machines need to be carefully balanced.
The right settings depend on:
- Workpiece material
- Cutter diameter
- Cutting tool material
- Machine rigidity
- Depth of cut
There isn’t one RPM or feed rate that works for every fly cutter setup. Start with suitable cutting conditions for your material and machine, then make small adjustments and evaluate the result.
This is especially important on a small CNC machine. The right speed and feed can help the cutter remove material cleanly while reducing unnecessary heat, vibration, and tool wear.
5. Take a Light Finishing Cut
If you’re trying to improve the final finish, you usually don’t need to take a deep or aggressive cut.
A light finishing pass removes a small, consistent amount of material and can leave a more uniform surface. Taking too much material at once increases cutting forces and can make vibration more noticeable, especially on smaller machines.
Let the cutter do the work. If you have to push the machine hard to get through the cut, your cutting conditions may need another look.
6. Keep the Machine Rigid
This is one of the easiest things to overlook.
If the workpiece moves, the tool flexes, or the machine vibrates, that movement can show up as chatter marks or repeating lines on the finished surface.
Before blaming the cutter, check the complete setup. A solid workholding arrangement and minimal tool overhang can make a noticeable difference.
Why Is My Fly Cutter Leaving Lines or a Rough Finish?
If the surface isn’t coming out as expected, start by looking for the obvious causes.
| Problem | Possible Cause | What to Check |
| Visible lines | Feed rate or tool geometry | Review cutting conditions |
| Rough surface | Dull cutting edge | Inspect the tool |
| Chatter marks | Vibration or poor rigidity | Check the setup and workholding |
| Uneven finish | Cutter alignment | Check tool positioning |
| Poor overall finish | Incorrect cutting conditions | Review speed, feed, and depth of cut |
Don’t change everything at once. Make one adjustment, run another pass, and see what changed.
That approach may take a little longer, but it tells you what actually solved the problem.
How to Get a Better Milling Surface Finish With a Fly Cutter
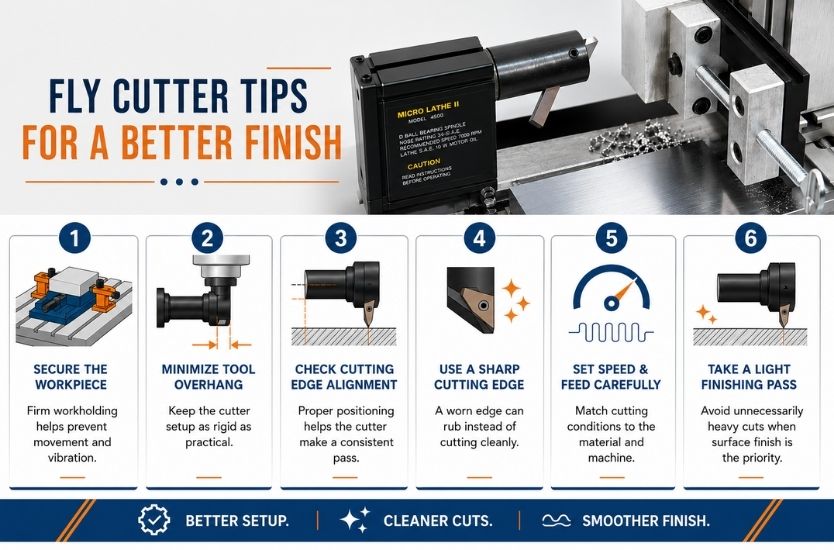
If your fly cutter isn’t producing the finish you want, work through this checklist:
- Start with a sharp cutting edge.
- Secure the workpiece properly.
- Reduce unnecessary tool overhang.
- Check for vibration before changing cutting parameters.
- Use a suitable spindle speed and feed rate.
- Take a light finishing pass.
- Check cutter alignment.
- Adjust one variable at a time.
A good finish usually comes from getting several small things right rather than finding one perfect setting.
Fly Cutter vs. Other Milling Cutters
The right milling cutter also depends on the type of operation, different milling machine configurations, and the feature you need to produce.
Here’s a quick way to decide:
Use a Fly Cutter When:
- You need to machine a broad, flat surface.
- Your main goal is a clean, consistent surface finish.
- You are taking a light finishing pass.
- You are working with a smaller milling machine that can handle the cutter size and cutting conditions.
A fly cutter is especially useful when surface flatness and finish matter more than removing a large amount of material quickly.
Use a Face Mill When:
- You need to remove material quickly from a larger surface.
- Your machine has enough power and rigidity for the cutter.
- You want to use multiple cutting edges for higher material removal rates.
Use an End Mill When:
- You need to cut pockets or slots.
- You are machining profiles or contours.
- You are working on smaller features that a fly cutter cannot reach effectively.
The simple rule is: use a fly cutter for broad, flat surfaces, a face mill for faster material removal, and an end mill for pockets, slots, and detailed features.
Choosing the right tool for the job can help reduce unnecessary cutting forces and produce a better finish without asking one cutter to do work it wasn’t designed for.
Can You Use a Fly Cutter on a Small Milling Machine?
Yes, you can use a fly cutter on a small milling machine, but you need to work within the machine’s limits.
Choosing a milling machine for a small workshop also means considering factors such as available space, rigidity, workpiece size, and the type of machining you plan to do.
Small milling machines generally have less power and rigidity than larger industrial equipment. That doesn’t mean you can’t get a good finish. It means your setup and cutting conditions need to be appropriate for the machine.
For better results:
- Choose a suitable cutter size.
- Avoid unnecessarily heavy cuts.
- Keep tool overhang short.
- Secure the workpiece firmly.
- Adjust speed and feed to suit the machine and material.
On a smaller machine, a controlled, stable cut will usually produce better results than trying to remove material as quickly as possible.
Common Fly Cutter Mistakes to Avoid
Many problems when using a fly cutter come down to a few basic mistakes:
- Running a dull cutting edge
- Taking cuts that are too aggressive
- Ignoring chatter
- Leaving too much tool overhang
- Using poor workholding
- Choosing unsuitable speed or feed settings
- Changing several cutting parameters at once
Choosing the right cutting tools for the machining operation can also help prevent unnecessary cutting forces and inconsistent results. If your finish looks poor, start with the basics. Check the tool and setup before assuming you need a completely different approach.
Final Tips for a Better Milling Surface Finish
A good finish with a fly cutter mill comes down to the whole setup, not just one setting.
Start with a sharp cutting edge and a firmly secured workpiece. Keep the tool overhang short, use sensible cutting conditions, and watch for vibration. If the finish isn’t right, change one thing at a time and see what the machine tells you.
With the right setup, a fly cutter for a milling machine can be a simple and effective way to produce clean, flat surfaces and improve your milling surface finish.
Frequently Asked Questions About Fly Cutters
What is a fly cutter used for?
A fly cutter is mainly used to machine broad, flat surfaces. It can also be useful for light finishing passes when you set up the machine and tool correctly.
Is a fly cutter good for surface finish?
Yes. A properly set up fly cutter can produce a smooth, consistent finish. The result depends on the cutting edge, machine rigidity, alignment, and cutting conditions.
What is the best speed for a fly cutter?
There is no single best speed for every setup. The correct speed depends on the workpiece material, cutter diameter, cutting edge, and machine. Start with suitable parameters and adjust based on the result.
Why is my fly cutter leaving lines?
Lines can come from the feed rate, tool geometry, cutter alignment, or cutting edge. Vibration or poor machine rigidity can also make the marks more noticeable.
What causes chatter when using a fly cutter?
Chatter usually points to vibration somewhere in the setup. Check the workholding, machine rigidity, tool overhang, and cutting conditions.
Can I use a fly cutter on a small milling machine?
Yes. Choose a cutter and cutting conditions that suit the machine’s capabilities. Light cuts, secure workholding, and a rigid setup can help produce a better finish.
What is the difference between a fly cutter and a face mill?
A fly cutter typically uses a single cutting edge and is often used for flat surface finishing. A face mill uses multiple cutting edges and can remove material more quickly if your machine has enough power and rigidity for the job.
